The cycling industry wants you to believe that a rusty chain is a death sentence for your bike or a specialized project requiring thirty dollars in chemicals and a degree in metallurgy. That’s completely bogus. Half the time, you can fix it with stuff you already have under your sink, and the other half the time, you should just throw the thing in the trash and spend fifteen bucks on a new one.
I’ve spent twenty-five years as a bike mechanic, which mostly means I’ve spent twenty-five years cleaning up after people who thought a little orange dust meant they needed a whole new drivetrain. I’ve also seen people try to “restore” chains that were so far gone they had the structural integrity of a wet cracker.
Here is the truth: rust is just nature trying to reclaim your bike. Sometimes you can fight it off. Sometimes nature wins. The trick is knowing which fight is worth your Saturday afternoon.
The Triage: Is Your Chain a Patient or a Corpse?
Before you go grabbing the degreaser and a stiff brush, you need to do a quick assessment. I call this the “corpse check.” If your chain fails this, no amount of scrubbing is going to bring it back to life.
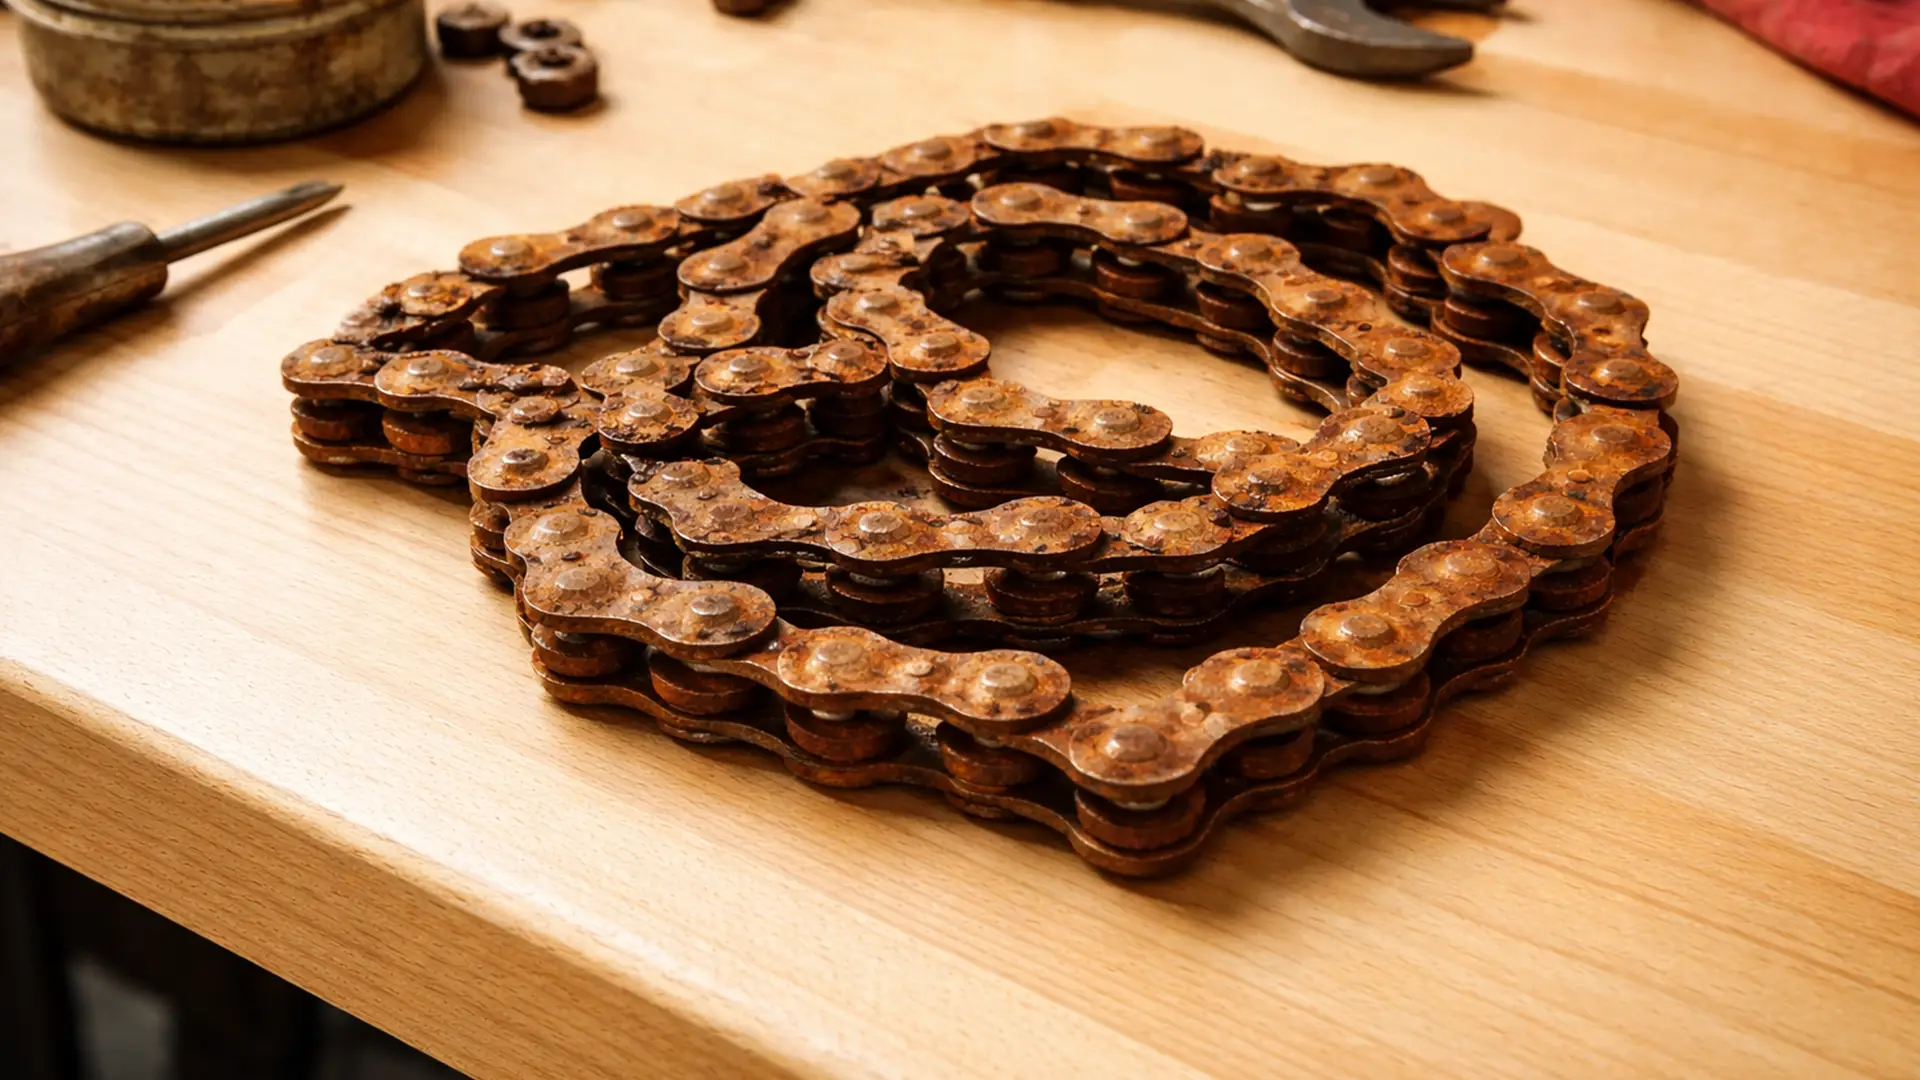
First, look at the links. If they are literally fused together into a jagged metal sculpture that won’t move, your chain is dead. If you try to ride a chain like that, you’ll probably snap your derailleur off, and then you’re looking at a hundred-dollar repair instead of a cheap chain replacement.
Second, check for “stiff links.” If you move the chain through the derailleur and it jumps or skips because certain links won’t bend around the pulleys, that’s deep-seated rust. You might be able to soak it out, but nine times out of ten, the internal pins are pitted. A pitted pin is a weak pin. I’ve seen those snap while someone was climbing a hill, which usually ends with a knee hitting a stem and a lot of swearing.
If it’s just surface rust, that orange powdery dust that looks like you rode through a Cheeto factory, you’re in luck. That’s purely cosmetic and we can deal with that in about twenty minutes.
The WD-40 Mistake (aka ‘The Mechanic’s Nightmare’)
We need to talk about WD-40. Everyone has a can. Everyone thinks it’s a lubricant. It isn’t.
I once watched a guy soak his entire drivetrain in WD-40 every day for a month because he liked how “clean” it looked. By the end of that month, his chain sounded like a bag of angry bees and his cassette teeth had taken a serious beating.
WD-40 is a solvent. It’s designed to displace water and break down gunk. It’s actually great for the first step of cleaning a rusty chain because it eats through the oxidation. But if you leave it there and go for a ride, it will evaporate, leave the metal bare, and attract every piece of grit on the road. That grit turns into a grinding paste that will eat your expensive bike parts for breakfast.
Use it to clean? Sure. Use it to ride? Only if you want to feed your local mechanic by visiting his shop frequently.
The Tools You’ll Need To Clean Your Chain
You don’t need a “Professional Drivetrain Restoration Kit” that costs forty dollars. You need a few basic things that you probably already have or can grab for under ten bucks total.
- A stiff brush: An old toothbrush works, but a brass-bristled brush from the hardware store (usually about three dollars) is the real secret weapon for rust.
- Degreaser: Dish soap works if you’re patient. Simple Green is better.
- Rags: Use an old t-shirt you don’t like anymore.
- Bike lube: This is the only part where you shouldn’t be cheap. Get a bottle of real wet or dry lube for about ten to twelve dollars. You can check the table below for reference on the top choices by how much less friction they create.

How to Clean the Damn Chain Efficiently , Tobias How-To
If you have a repair stand, now’s the time to use it,being able to spin the pedals while the bike stays put makes this job easier. If not, don’t worry. You can do this with the bike flipped upside down or just leaning against a wall.
Don’t overcomplicate this. We aren’t performing surgery; we’re removing some orange flakes.
Step 1: The Initial Scrub , The ‘Dustening’
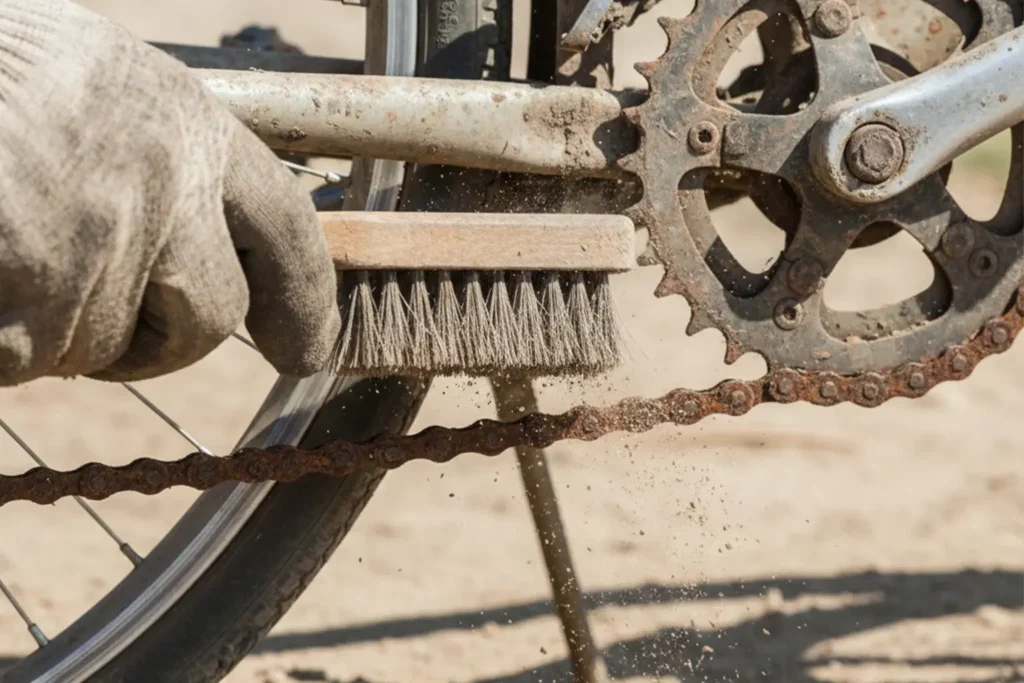
Take your dry brush, don’t add water yet, and scrub the chain while it’s still on the bike. Just back-pedal and hold the brush against the rollers. You want to get as much of that loose, powdery rust off as possible while it’s dry. If you add liquid now, you just make an orange mud that’s harder to get out of the links. Spend a few minutes on this. You’ll see a pile of orange dust on the floor. That’s your progress indicator.
Step 2: The Solvent Soak
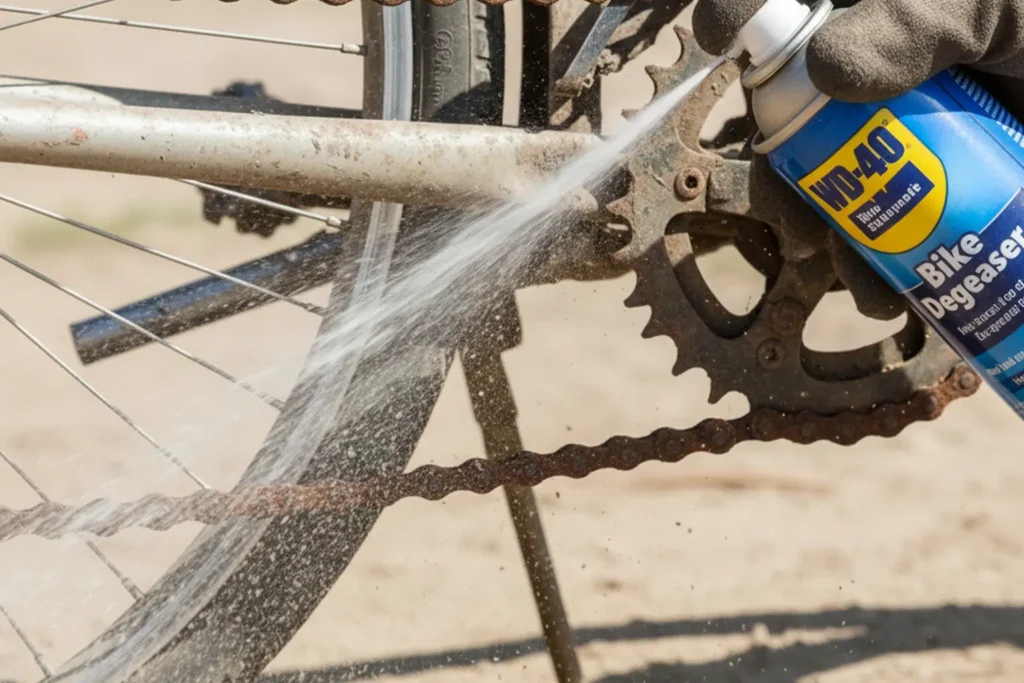
Now you grab your degreaser or your WD-40 (since we’re just using it as a cleaner). Spray it onto a rag and wrap the rag around the chain. Grip it tight and back-pedal for about thirty seconds.
You’re trying to get the solvent inside the rollers. That’s where the worst culprit of rust usually resides. Surface rust on the outside of the plates is ugly, but rust inside the pins is what kills the chain.
Step 3: The Deep Scrub
Take your brush again, dip it in some warm soapy water, and go to town. Scrub the top, the bottom, and the sides. You want the chain to look like metal again, not a rusted relic from a shipwreck.
If you’re using dish soap, make sure it’s the kind that cuts grease. Blue Dawn is the gold standard being used across the US by every shop and enthusiast alike. If it’s good enough for oil-covered ducks, it’s good enough for your Shimano chain.
Step 4: The Rinse and Dry , Non-Negotiable
This is where most people mess up. They leave the chain wet. Water causes rust. If you leave your freshly cleaned chain wet, it will be orange again in no time.
Rinse the soap off with a low-pressure hose. You should never use a power washer on a bike unless you want to blast the grease out of your bearings. Then dry it off immediately. Use a clean rag and get it as dry as humanly possible. I sometimes use a hair dryer if I’m feeling particularly motivated, which is quite rare for someone like me.
Step 5: Lubrication , The ‘Saving Grace’
Now that you’ve got a clean and dry chain, you have to protect the metal. Apply one drop of actual bike lube to every single roller. Don’t just spray it on like you’re spray-painting a fence.
Once you’ve done the whole chain, back-pedal for a minute to let the lube work its way into the pins. Then, and this is critical, take a clean rag and wipe off the excess. You want the lube inside the chain, not on the outside. A wet-looking chain just attracts dirt.
When to Call It and Buy A New $20 Chain
I truly love when you can fix up old things and skip the endless cycle of waste, I hate being wasteful. But a basic 8-speed or 9-speed chain costs somewhere around fifteen to twenty-five dollars.
If you spend two hours scrubbing a chain and it still feels crunchy or stiff, you’ve wasted twenty dollars’ worth of your time to save a part that’s already compromised.
I’ve had people bring me “restored” chains that they spent three days soaking in vinegar. Vinegar is an acid. It removes rust, but it also causes hydrogen embrittlement in high-carbon steel. That’s my fancy way of saying it makes the metal brittle. That could easily end up with a broken chain down the road and you put in all that work for no effort.
If the rust has caused “pitting”, tiny holes in the metal, the chain is structurally weakened. At that point, you aren’t being thrifty; we’ve entered stupidity territory. Buy a new chain. KMC makes great ones for under twenty dollars that will last you a couple of years if you give them the love they deserve.
The ‘Lazy Person’s’ Prevention Plan
I am fundamentally a lazy person when I’m not on the clock (sometimes when I am too). I don’t want to deep-clean my bike every week. I bet nobody does.
This is one of the classic beginner mistakes, people think maintenance has to be complicated, so they do nothing instead. Then they’re surprised when their bike sounds like a dying robot six months later.
The secret to never dealing with a rusty chain again isn’t a fancy cleaning machine. It’s just three things:
- Wipe it down after a wet ride: If you’re bike commuting and get caught in the rain, take thirty seconds to run a dry rag over the chain when you get home. It removes the moisture that starts the oxidation process.
- Store it inside: If you leave your bike on a balcony or in a damp shed, it will rust. Period. Humidity is the enemy. If you have to keep it outside, get a waterproof cover that breathes.
- Lube it up: After you’ve cleaned the chain its always a good thought to run the chain through some lube.
If you ride in a coastal area with salt air, you’re playing the game on Hard Mode. You’ll need to lube your chain twice as often as someone in Arizona. Salt is like a catalyst for rust; it’s genuinely horrifying how fast it can eat a drivetrain.
The Takeaway
A rusty chain isn’t always a disaster, but it is always a warning. It means you’ve been ignoring the most important part of your bike’s engine.
Take the twenty minutes to clean it if it’s just surface dust. You’ll feel a lot better when your bike doesn’t sound like a Victorian-era factory every time you pedal. But if the links are stiff or the rust has penetrated deep, just simply replace it for a sparkling new one. Your knees and your wallet will thank you when you don’t have to fix a snapped derailleur three miles from home.
It’s just metal and oil. Don’t let the industry make it sound like magic. Clean it, lube it, or replace it. Then go for a ride and stop worrying about it.
Found this useful? Share it with a fellow rider.
🚲 Get LaneSpotter in Your Inbox
Weekly riding tips, gear deals, and no-BS reviews. No spam, unsubscribe anytime.
Join 500+ riders who skip the marketing fluff
Leave a Reply