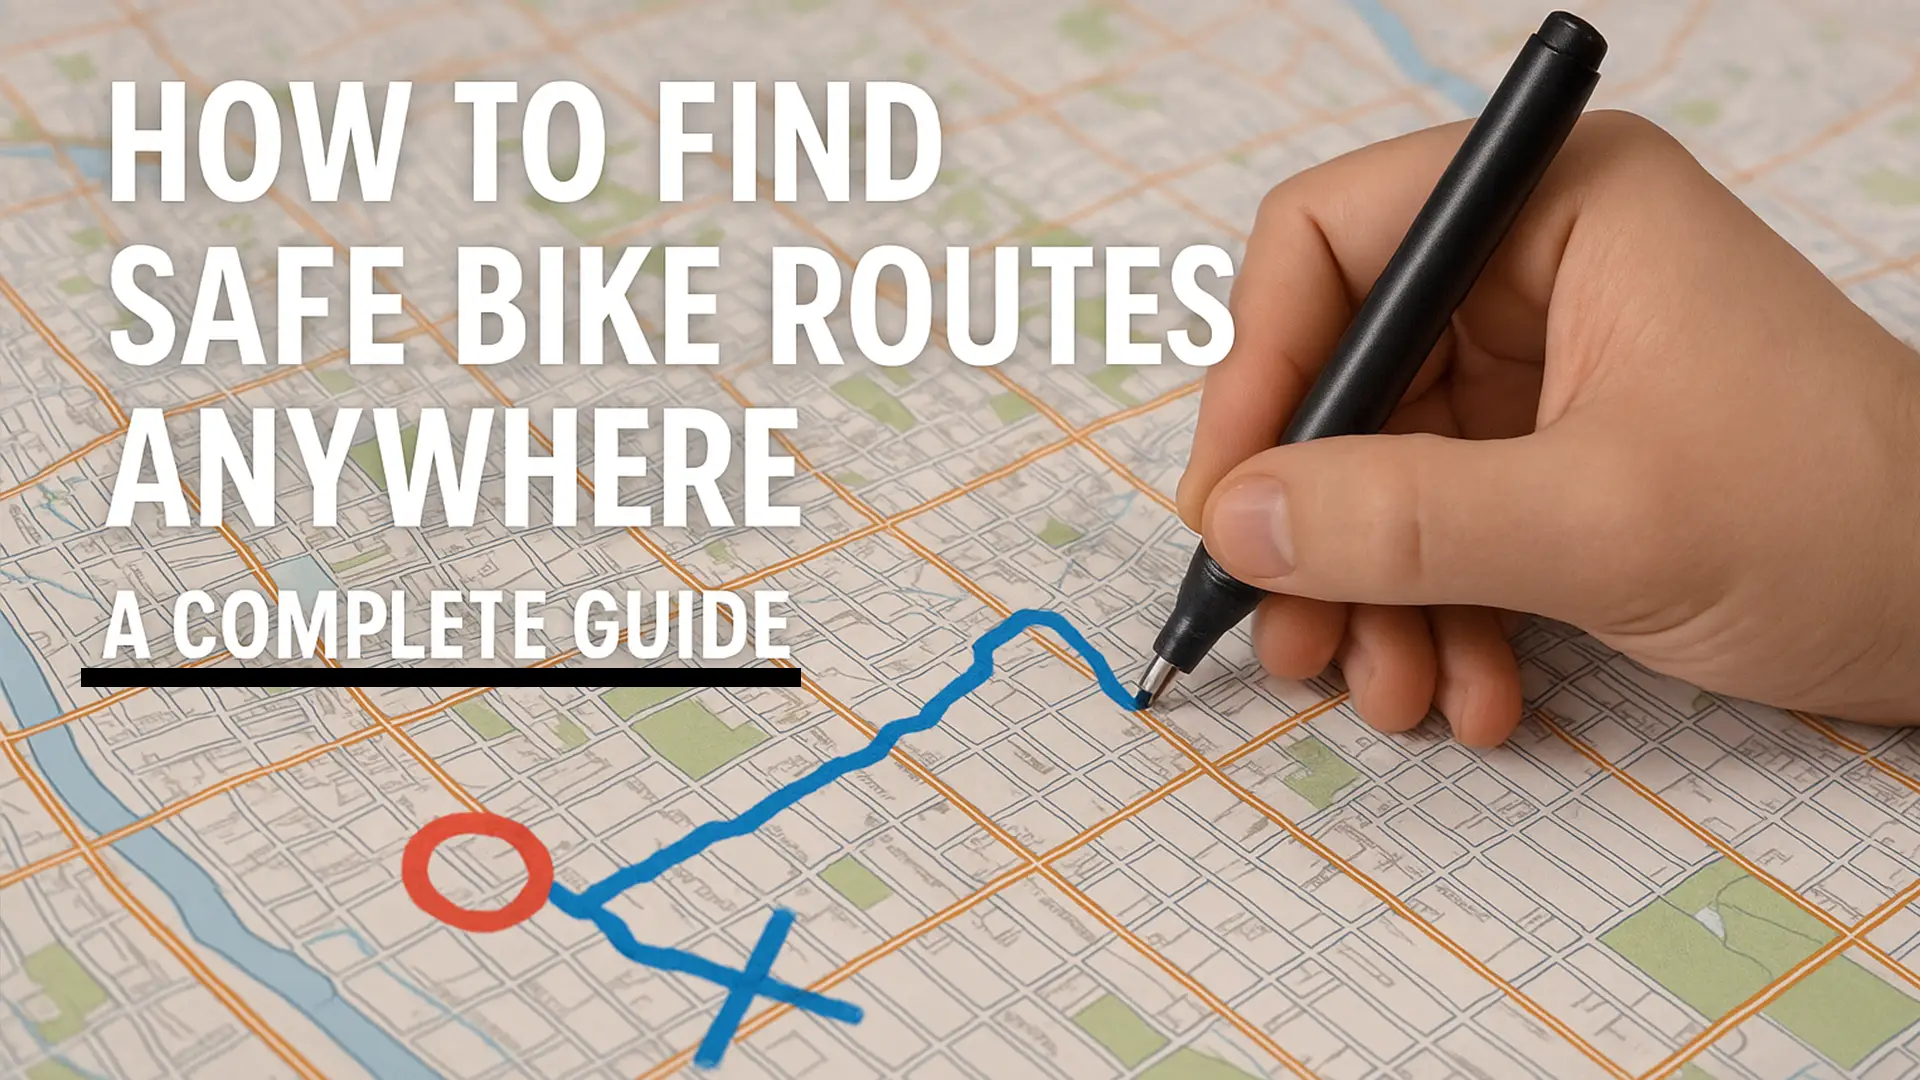
I’ve planned 100’s of routes and while doing so I’ve probably made every possible mistake you can imagine. From ending up on a highway in some rural city I can’t even remember the name of to getting trapped in a construction zone in downtown Chicago, I’ve learned that finding safe bike routes isn’t just about using the right app, it’s about understanding how to read between the lines of what these tools tell you.
The problem with most route planning advice is that it assumes you’re riding in your hometown where you know which streets turn into parking lots at 5 PM and which intersections are basically death traps. But what happens when you’re somewhere completely new? Or when you’re traveling and need to figure out safe routes in a country where you don’t even speak the language?
Here’s everything I’ve learned about finding safe bike routes anywhere!
The Reality Nobody Talks About
Most cycling route articles give you the same tired advice: “Use Google Maps bike layer” and “Ask at local bike shops.” That’s fine for Sunday rides around your neighborhood, but it’s completely useless when you’re trying to figure out if that route from your hotel to the conference center is going to get you killed.
The truth is, route safety depends on context that changes faster than any app can update. That bike lane might be perfect at 10 AM and completely unusable at 4 PM when it becomes a parking spot for delivery trucks. The “quiet residential street” might be fine except for the 20 minutes when the nearby school lets out and it becomes a racetrack for soccer moms.
Once when I was biking in what was supposed to be a bikers paradise. The app showed a beautiful protected bike lane that looked perfect on paper. What it didn’t show was that half the lane was blocked due to construction, forcing cyclists into traffic on a road with no shoulder and 45 mph speed limits. The local knowledge gap nearly got me flattened.
Layer Your Intelligence Sources
The key to finding safe routes anywhere is using multiple information sources and understanding what each one actually tells you. Think of it like building a complete picture from partial information.
Strava Heat Maps: Your Crowd-Sourced Safety Net
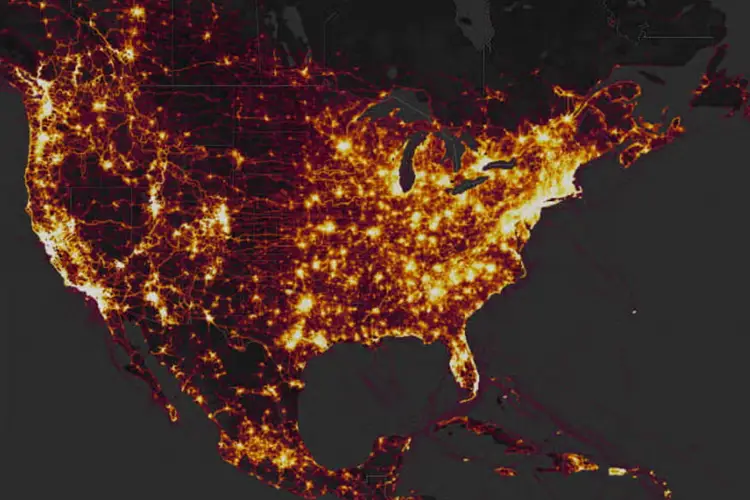
Strava’s heat maps show where cyclists actually ride, revealing “every little goat-trail short cut, back alley, and otherwise ‘secret’ short cuts” that other cyclists have discovered. But here’s what most people miss , the absence of heat is just as important as the presence of it.
When I see a road that looks perfectly rideable on satellite view but has zero Strava activity, that’s a red flag. Either there’s something dangerous about that road, or there’s a much better parallel route that all the locals know about. I’ve used this technique to avoid some genuinely sketchy situations, including a “bike-friendly” road in rural Oregon that turned out to be a logging truck highway.
The heat maps also reveal seasonal patterns if you know how to read them. Routes that are popular in summer but empty in winter often have weather-related safety issues , poor drainage, no snow clearing, or limited daylight visibility.
Google Street View: Your Virtual Bike Pal

Before any unfamiliar route, I virtually ride the sketchy sections using Street View. This sounds obsessive, but it’s saved me countless times. I’m looking for things the routing algorithms miss completely.
Real shoulder width versus what the map claims is huge. I’ve seen roads marked as “bike-friendly” that have theoretical shoulders that disappear whenever there’s a bridge or construction zone. Street View lets you see the actual riding conditions, not just the theoretical ones.
Sight lines around curves matter more than most cyclists realize. If you can’t see oncoming traffic and they can’t see you, that’s a problem regardless of what the speed limit says. I check every major curve and hill crest on unfamiliar routes.
Traffic light timing and lane markings tell you everything about how that intersection actually works. Some intersections look fine until you realize the bike lane just dumps you into a right-turn-only lane with no escape route.
Local Digital Intelligence: Beyond Bike Shops
Everyone says “ask at bike shops,” but here’s the thing , bike shop employees often ride very different routes than you need. They know the best training routes and weekend rides, but they might not know the safest way to get from the airport to downtown at 7 AM on a Tuesday.
I’ve had much better luck with local cycling Facebook groups, city-specific subreddits, and even hotel concierges who bike commute. These people know the real-world conditions, not just the ideal recreational routes.
The key questions to ask: What’s rush hour like on specific roads? Are there any construction projects affecting bike routes? Which intersections should I absolutely avoid? What time of day is this route safest?
The International Route Planning Challenge
Finding safe routes gets exponentially harder when you’re dealing with different traffic patterns, road design standards, and cycling cultures. What works in the US definitely doesn’t work in Bangkok. Here are a few key generalisations I’ve picked up from talking with experienced riders abroad.
European Cities: Infrastructure Assumptions
European cities generally have better cycling infrastructure, but the traffic patterns are completely different. Many European bike lanes are designed for slower, more casual riding than American cyclists are used to. I’ve gotten dirty looks and created dangerous situations by riding American-style in European bike lanes.
The key insight: European routing apps “choose the most efficient route, taking into account how bike-friendly a road or path is” but they assume you’re riding like a local. When I’m in Europe, I intentionally choose routes that are 20% longer but designed for the riding style I’m comfortable with.
Asian Cities: Navigate the Chaos
Asian cities often have bike infrastructure that looks chaotic to Western eyes but works perfectly if you understand the local patterns. In cities like Seoul or Tokyo, the safest routes often involve mixing bike lanes, sidewalks, and pedestrian areas in ways that would be illegal in the US.
The trick is finding local cycling groups on social media before you travel. They’ll often share specific route advice that no app can provide. I learned more about safe cycling in Taipei from a 30-minute conversation with a local cyclist than from hours of app research.
Developing Countries: Infrastructure Reality Check
In many developing countries, the marked bike infrastructure exists more in theory than practice. I’ve found that routes marked as “bike lanes” are often motorcycle lanes, delivery vehicle storage, or just unusable due to poor maintenance.
The safest approach is to focus on low-traffic residential areas and accept that you’ll be sharing the road with everything from buses to farm equipment. Local knowledge becomes absolutely critical, you need to know which roads are safe and during what hours.
Seasonal and Weather-Based Route Adjustments
Most route planning ignores seasonal safety changes, but they’re huge. That perfect summer route might be completely unusable in winter, and not just because of snow.
Winter Considerations Beyond Snow
Even in mild climates, winter brings safety challenges that most cyclists don’t consider. Shorter daylight hours mean you might be riding in darkness even on afternoon rides. Road surfaces that are perfect in summer can become slippery with just a little moisture.
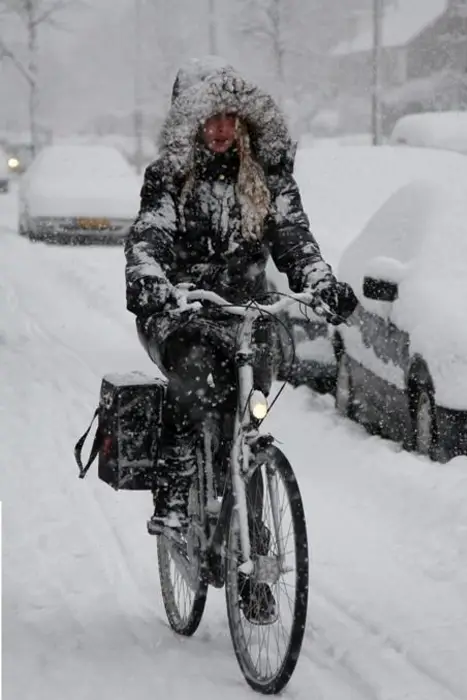
I’ve learned to check multiple Street View dates to see how routes look in different seasons. That bike path that’s beautiful in summer might be completely flooded in winter, or blocked by snow storage even in areas that don’t get much snow.
Summer Heat and Visibility
Summer brings different challenges. Roads that are fine in cooler weather can become dangerous when heat mirages affect visibility. Desert areas can have dangerous crosswinds that make certain routes unusable during peak heat hours.
Urban heat islands change traffic patterns too. Routes that are quiet in cooler weather might become busy when everyone’s trying to avoid highway heat. I’ve learned to check local weather patterns and adjust my route timing accordingly.
The Night Riding Route Evaluation
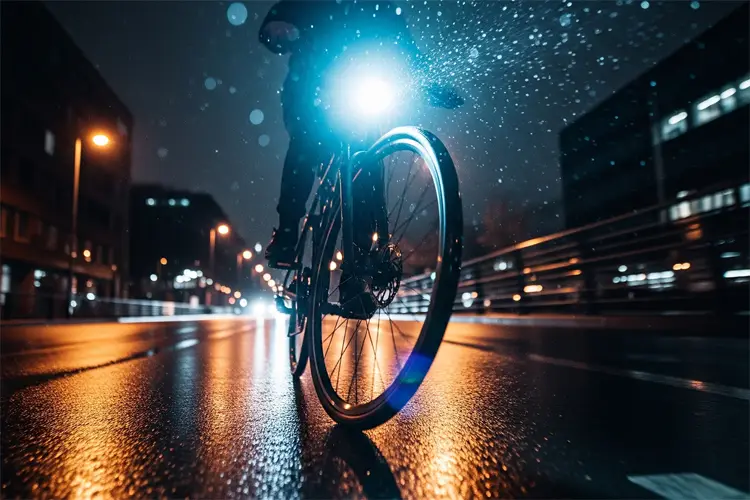
Most route planning completely ignores night riding safety, but it’s a completely different game. Routes that are perfectly safe during the day can become death traps after dark.
Lighting Infrastructure Assessment
Street lighting quality varies dramatically even within the same city. I use Street View to check lighting along unfamiliar routes, but I also look for clues about lighting quality , newer commercial areas usually have better lighting than older residential areas.
The key is identifying stretches of road with no lighting at all. These aren’t necessarily unsafe, but they require different safety strategies and equipment than well-lit routes.
Traffic Pattern Changes
Night traffic patterns are completely different from day patterns. Routes that are busy during the day might be empty at night, which sounds good but can actually be more dangerous , drunk drivers, reduced visibility, and no witnesses if something goes wrong.
I’ve found that routes with consistent moderate traffic are often safer at night than either very busy or very quiet routes. Enough traffic to keep drivers alert, but not so much that you’re fighting for space.
Technology Integration That Actually Works
The key to finding safe routes anywhere is using multiple technologies in combination, not relying on any single app or tool.
The Three-Layer Approach
I start with routing apps like Komoot or Google Maps to get the basic route options. Komoot focuses on “the ride experience” while Strava has “a greater focus on performance”, so I use Komoot for initial route planning and Strava for safety verification.
Then I layer in Strava heat maps to see where cyclists actually ride versus where the apps think they should ride. Finally, I use Street View to verify the actual conditions of any questionable sections.
Real-Time Intelligence
Static route planning only gets you so far. I use Waze to check for accidents, construction, or events that might affect my route. Even though Waze is designed for cars, it’ll alert you to conditions that affect cyclists too.
Local traffic apps often have better real-time information than general navigation apps. When I’m traveling, I download the local traffic app and use it to check conditions before rides.
Emergency Backup Planning
Every route needs an escape plan. I identify public transportation options, taxi pickup points, and bike shops along my route before I start riding. This isn’t paranoia , it’s practical planning for mechanical failures, weather changes, or route conditions that are worse than expected.
The Community Intelligence Network
The most valuable route safety information comes from other cyclists who actually ride in the area regularly. But you need to know how to find and evaluate this information.
Reddit and Local Forums
City-specific cycling subreddits are gold mines for route safety information. Search for recent posts about dangerous intersections, construction projects, or route changes. The information is usually more current than official sources.
But be careful about the source , weekend recreational riders often have very different safety priorities than commuters or touring cyclists. Make sure the advice matches your riding style and risk tolerance.
Social Media Groups
Facebook cycling groups for specific cities often have detailed discussions about route safety. I’ve found incredibly detailed information about things like which intersections have problematic signal timing or which roads have dangerous storm drain grates.
The key is asking specific questions rather than general ones. “What’s the safest way to get from downtown to the airport at 6 AM?” gets much better answers than “What are some good routes?”
Cycling Apps with Social Features
Apps like Komoot aren’t just great for routing, they have social features that let you see routes and comments from other cyclists. Komoot’s “Pioneers” system helps users share expertise and find “the most beautiful highlights”, but it also reveals safety information if you know how to read it.
Comments on routes often contain safety warnings that don’t show up in the route data itself. My advice is to always read recent comments on any route you’re planning to use.
Common Route Safety Mistakes (And How to Avoid Them)
After years of route planning mistakes, I’ve identified the most common errors that lead to dangerous situations. Check my best practices for cycling in heavy traffic.
The “Shortest Route” Trap
Routing apps default to the shortest or fastest route, not the safest. I’ve learned to always generate multiple route options and compare them for safety factors, not just distance or time.
Sometimes the route that’s 10% longer is 50% safer. That extra few minutes is worth it when you’re dealing with unfamiliar roads or challenging traffic conditions.
Ignoring Time-of-Day Factors
Routes that are perfectly safe at 10 AM might be dangerous at 5 PM. School zones, business districts, and residential areas all have different safety profiles throughout the day.
I’ve learned to think about my route timing as carefully as my route selection. Sometimes changing your departure time by 30 minutes makes a bigger safety difference than changing your route.
Overconfidence in Bike Infrastructure
Just because a road has bike lanes doesn’t mean it’s safe. I’ve seen bike lanes that are poorly designed, poorly maintained, or that dump you into dangerous situations at intersections.
The key is evaluating the entire route, not just looking for the presence of bike infrastructure. Sometimes the road with no bike lane but lighter traffic is much safer than the road with a poorly designed bike lane.
Putting It All Together: My Complete Route Evaluation Process
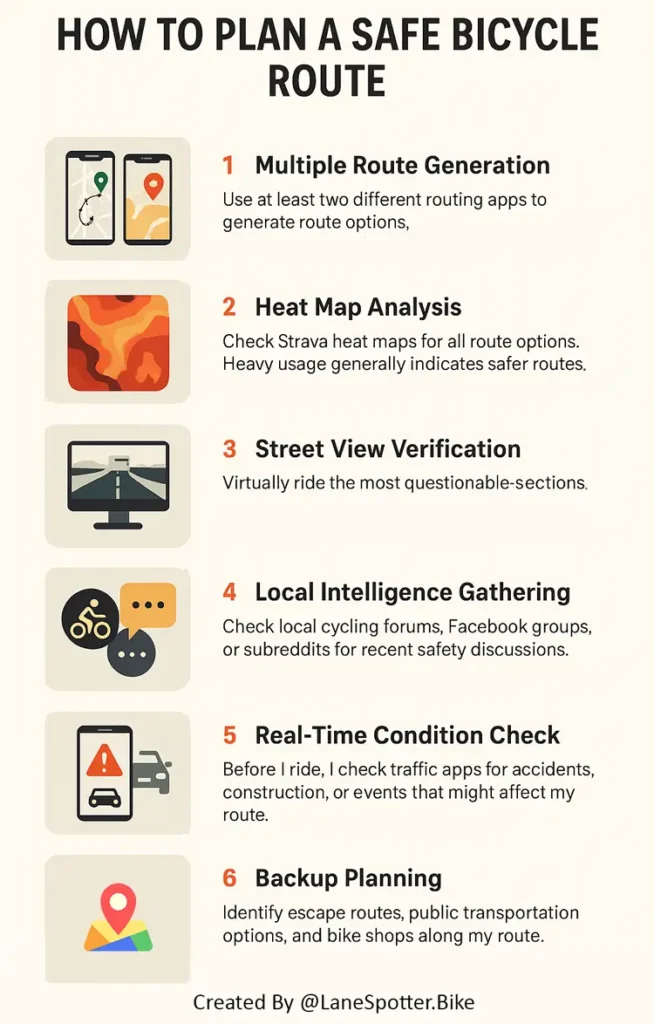
Here’s my complete process for evaluating route safety anywhere in the world:
- Step 1: Multiple Route Generation I use at least two different routing apps to generate route options. This usually reveals different approaches to the same destination and helps identify the safest option.
- Step 2: Heat Map Analysis I check Strava heat maps for all route options. Heavy usage generally indicates safer routes, but I also look for patterns , routes that are popular during certain times of day or seasons.
- Step 3: Street View Verification I virtually ride the most questionable sections of my preferred route using Street View. This includes every major intersection, bridge, and any section that showed low heat map activity.
- Step 4: Local Intelligence Gathering I check local cycling forums, Facebook groups, or subreddits for recent safety discussions. I’m looking for construction updates, accident reports, or general route recommendations.
- Step 5: Real-Time Condition Check Before I ride, I check traffic apps for accidents, construction, or events that might affect my route. This is especially important for longer routes or rides in unfamiliar areas.
- Step 6: Backup Planning I identify escape routes, public transportation options, and bike shops along my route. I also make sure someone knows my planned route and expected arrival time.
Don’t forget to read the tips and tricks in my complete bike route evaluation system.
The Takeaway on Route Safety
Finding safe bike routes anywhere comes down to understanding that route safety is contextual and dynamic. The safest route for you depends on your experience level, risk tolerance, local conditions, and timing.
The key is building a complete picture from multiple information sources rather than relying on any single tool or piece of advice. Apps and technology are helpful, but they’re still just tools , the real skill is knowing how to interpret and combine information from different sources.
Most importantly, trust your instincts. If a route feels like playing the roulette wheel, it’ll probably feel worse when you’re actually riding it. Sometimes the longer, more conservative route is the better choice.
Remember, the goal isn’t to eliminate all risk, it’s to make informed decisions about acceptable risk levels. Every route has some risk, but good route planning helps you understand and manage that risk effectively.
The best route safety tool is experience, but while you’re building that experience, use these techniques to make smarter route choices.
Don’t forget that if you’re going through multiple jurisdictions you need to keep tabs on varying laws. Check out the different states helmet laws on our hub page.
Now get out there and explore. The world is full of amazing places to ride, and with proper route planning, you can get there safely.
Found this useful? Share it with a fellow rider.
🚲 Get LaneSpotter in Your Inbox
Weekly riding tips, gear deals, and no-BS reviews. No spam, unsubscribe anytime.
Join 500+ riders who skip the marketing fluff
Leave a Reply